Featured Recipe
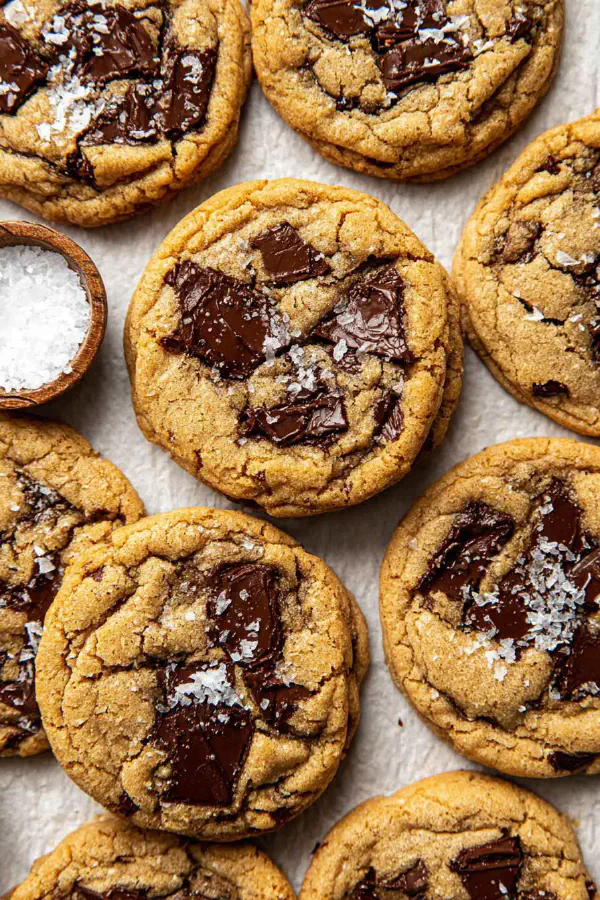
Brown Butter Almond Cookies
By Kate
"
Brown butter adds deep nuttiness. Almond flour swaps out part of the all-purpose for moist crumb and subtle flavor twist. Coconut sugar and maple syrup replace the refined for warm, caramel notes. A dash of cinnamon lifts the profile. Toasted sliced almonds and dark chocolate chunks, some pressed on top before baking, add texture and bursts of bitterness. Watch dough texture closely - oily but soft, not dry, or add milk splash. Baking time shifts slightly depending on oven heat; underbake for chewy centers, edges set but not stiff. Sea salt garnish optional but recommended to contrast sweet. Yield 22 standard size cookies.
"
Prep:
35 min
Cook:
12 min
Total:
47 min
Serves:
22 cookies
cookies
baking
desserts
almond
chocolate
Introduction
Brown butter. It’s a magic trick with heat and time. Butter melts, foams, then browns, transforming bland fat into rich, nutty flavor bombs. Understanding browning beyond color is key; smell is your best guide—the smell turns from buttery to toasted nuts. No rush on cooling butter; too hot means scrambled eggs if added too soon. Swapping in almond flour for half the flour lightens crumb and adds moisture without beating flavor balance. Coconut sugar and maple syrup bring less processed sweetness, caramel undertones, and retain moisture better than white sugar alone. Toasted almonds add crunch and toasted depth—not just chocolate in here. Pressing chocolate chunks on cookie tops before baking ensures melty, attractive chunks that meld into dough instead of sinking off or burning. Small tweaks in baking temp and time from the original recipe reflect oven variation and moisture level in dough. Underbake slightly for chewy edges and gooey centers; look for browned edges but soft, glossy middles. Cool completely on racks to firm texture. Flaky salt is a kitchen hack most skip, but it pulls out flavors you might miss. No fluff, just real, tested technique with sensory clues and practical tips to solve common problems like dry dough or spreading. Cook with your senses, not just clocks.
Ingredients
About the ingredients
Using half almond flour cuts gluten development and delivers softer, denser crumbs. Swap coconut sugar or light brown sugar for white sugar to deepen complexity and moistness. Maple syrup adds humectant qualities and subtle maple flavor; honey is an alternative but can brown dough faster. Milk is optional and customizable—whole creates richer texture; plant-based milks bring subtle flavors and thinner dough. Toasting almonds beforehand gets rid of grassy notes and adds crunchy contrast; raw almonds will taste flat and lose snap. Dark chocolate chunks preferred here for slight bitterness that offsets sweet dough. Baking soda added for controlled rise and chewiness; avoid baking powder or cookies will puff differently. Don’t skip salt; it balances and rounds sweet and rich flavors.
Method
Technique Tips
Butter browning is the linchpin—use medium heat and swirl constantly to check color and smell. Stop when you smell toasted nuts and see tiny brown bits, not black flakes. Cooling prevents eggs cooking prematurely. Mixing sugars into browned butter dissolves tougher grains and yields chewy texture. Eggs until combined but avoid overbeating; air bubbles cause uneven texture. Sifting dry ingredients ensures uniform mixing and removes lumps, important with almond flour which tends to clump. Folding, not stirring extensively, keeps gluten low for tender crumb. If dough is dry, add milk one teaspoon at a time—avoid over-liquefying dough which leads to spreading. Dunking dough balls in chocolate chunks instead of mixing all in tops them evenly and creates attractive cookies. Baking temperature lowered slightly from original for thicker dough with almond flour; watch edges closely—golden, firm edges signal done, centers glossy but not raw-looking remain chewy. Shaking pan after baking rounds edges for neat shape. Cooling on sheet is crucial before moving to rack; dough firms by residual heat. Flaky sea salt just before cooling pulls and accentuates all flavors, a chef’s move few are mindful to do.
Chef's Notes
- 💡 Watch brown butter closely; too hot cooks eggs when added. Remember soft bubbling sound; look for nutty aroma, little brown bits on bottom. No rush on cooling.
- 💡 Mix coconut sugar, maple syrup into warm butter until smooth. Helps dissolve grains for good chew; doesn’t dry out. Eggs added one at a time to emulsify, bind. Use medium speed.
- 💡 Keep an eye on dough texture. Oily but soft, not dry or crumbly. Adding milk helps fix texture issues. A splash very effective—teaspoon at a time. Avoid too much liquid.
- 💡 Baking time varies per oven. Edges should be golden brown, centers soft and glossy. Jiggle pan, if it wobbles slightly, done. Undercook for chewy; overbake, drying happens.
- 💡 Flaky sea salt on top provides contrast. Sharpens all sweet flavors. Do right before cooling. Small steps, big taste difference—easy chef trick. Don’t skip, worth it.
Kitchen Wisdom
Can I use regular sugar?
Yes, but coconut sugar brings more depth with moisture. White sugar less complex, dryness risk higher with almond flour.
What if my cookies spread too much?
Watch dough moisture; could be too wet. Adjust by adding almond flour, not too much, or chill dough before baking.
Can I substitute ingredients?
Sure! Honey for maple works but browns faster. Whole milk richer, almond milk lighter. Play around based on pantry.
How to store the cookies?
Airtight container. Lasts a week at room temp. Freeze for longer storage—up to three months. But freeze before baking for best results.