Featured Recipe
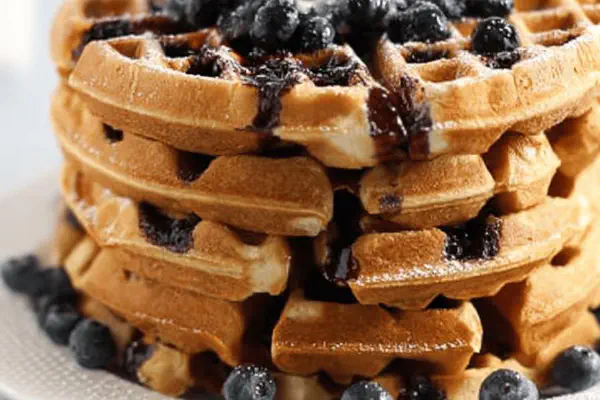
Buttermilk Cornstarch Waffles

By Kate
"
Classic waffles with a twist: less flour, added oat flour for texture and nutty depth, swapping canola oil for melted unsalted butter. The batter rests for easier handling and crispier edges. Eggs beaten longer for volume, balanced sweetness with brown sugar replaced partly by honey. Cook in preheated waffle iron until golden brown, steam hisses stop. Textured, tender, slightly chewy. Easy substitutes for dairy or flour provided. Expect a rustic, lively waffle not overly smooth, with bite and browning cues guiding timing.
"
Prep:
25 min
Cook:
18 min
Total:
43 min
Serves:
12 waffles
waffles
breakfast
brunch
baking
Introduction
Start with eggs. Not just cracked in and mixed. Whip them till ribbons form. That’s where volume begins—your waffle isn’t flat pancake masquerading as a waffle. Then butter warms just so: too hot and it kills your bubbles; too cold and it sinks to the bottom. Mixing dry ingredients like flour, cornstarch, salt, and baking soda lets them spread evenly. Cornstarch is your secret weapon for crisp edges—wafers instead of soggy pancakes. Rest the batter. 10-15 minutes is worth it for the flour to hydrate and the texture to tighten. Watch steam, the sound that signals doneness. When it quiets, your waffle is golden, crispy at the edges but tender inside. Avoid the common mistake of overmixing which creates toughness. These waffles have slight lumps—that’s normal and wanted for authentic texture. No smooth industrial batter here. Flavor? Honey plus brown sugar creates complexity but not saccharine sweetness. Melted butter brings richness, replaceable with canola, but expect flavor loss. Use oat flour to add rustic chew; whole wheat is a last resort—too strong for delicate waffle flavor. Master these fundamentals and your waffle iron will thank you.
Ingredients
About the ingredients
Flour adjustment is key—reducing all-purpose flour and adding oat flour alters texture and flavor. Oat flour’s finer softness keeps waffles tender but slightly chewy, avoids heaviness. Cornstarch is essential here—not just filler. Gives structural crunch. Salt and baking soda must be measured precisely; too little and waffles are flat, too much and bitterness rises. Egg whites beaten separately isn’t necessary but think of beating whole eggs thoroughly as the same air-enrichment step. For oil, unsalted melted butter provides richness and superior mouthfeel compared to neutral oils like canola, but canola oil is an acceptable cheat. Buttermilk adds acidity activating baking soda—if unavailable, add 1 tbsp lemon juice or white vinegar to milk, let sit 5 minutes. Sugar changes: swapping part brown sugar with honey adds moisture and flavor depth. Honey can brown faster so watch cooking times. Typical batter thickness lies between pancake batter and cookie dough: think pourable but dense—clinging in dollops rather than flowing liquid.
Method
Technique Tips
Step order matters. Beat eggs and sugars first until pale and ribboning for volume, or expect dense waffles. Incorporate melted butter gently—too hot scrambles eggs, too cold leads to oily pockets. Alternate dry ingredients with buttermilk folding carefully to avoid overmixing: some small lumps of flour visible are fine and desirable. Let batter rest for up to 15 minutes to hydrate starch and relax gluten, which improves texture and edge crispness. Cooking is equal parts temperature and timing: preheat your waffle iron fully; a hot, crackling sizzle when batter hits is your sign. Hardware differs—monitor steam release towards end of cooking: when it slows considerably, open carefully. Crispy edges should pull slightly away from iron’s waffle pockets. Stack waffles on wire rack or keep warm in low oven to leave crisp edges intact. Avoid stacking in piles immediately; steam ruins your crunch. Common mistakes include overmixing causing tough waffles, or pouring too much batter causing uneven cooking. Use less batter for thinner, crisper waffles and more for thick, tender interiors. Note substitutions and adjustments can affect batter hydration and cooking times so treat visual and tactile cues as primary indicators.
Chef's Notes
- 💡 Waffles hinge on egg volume. Beat them long. Six minutes—light and fluffy. Pancake flatness? Do it right. No shortcuts. Keep an eye on air.
- 💡 Melted butter? Just warm. Too hot scrambles; too cold sinks. Drizzle while mixing at low speed. Don't rush. Texture means everything.
- 💡 Buttermilk magic. Acidity helps rise. Run out? Mix milk with lemon juice. Let it sit. It works in a pinch. No buttermilk? Options exist.
- 💡 Batter resting vital. Helps with hydration and texture. 15 minutes can make a difference. Don't skip this part. Critical for crisp edges.
- 💡 Thickness check. Pourable but thick, not runny. If too thick? Splash some milk. Too thin? More flour. Balance means good waffles. Adjust as needed.
Kitchen Wisdom
What if my waffles are dense?
Air is key. Beat eggs longer. Mix gently. If batter thick? Add milk for balance. Watch mixing.
Can I use whole wheat flour?
Yes, but it changes flavor and texture. Earthier taste. Better as a last resort. Watch density.
What’s the best storage method?
Keep waffles warm in the oven. Stack? Not yet. Steam softens. Separate layers with parchment.