Featured Recipe
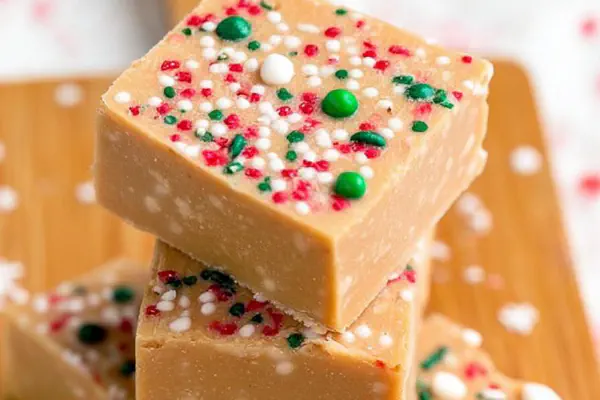
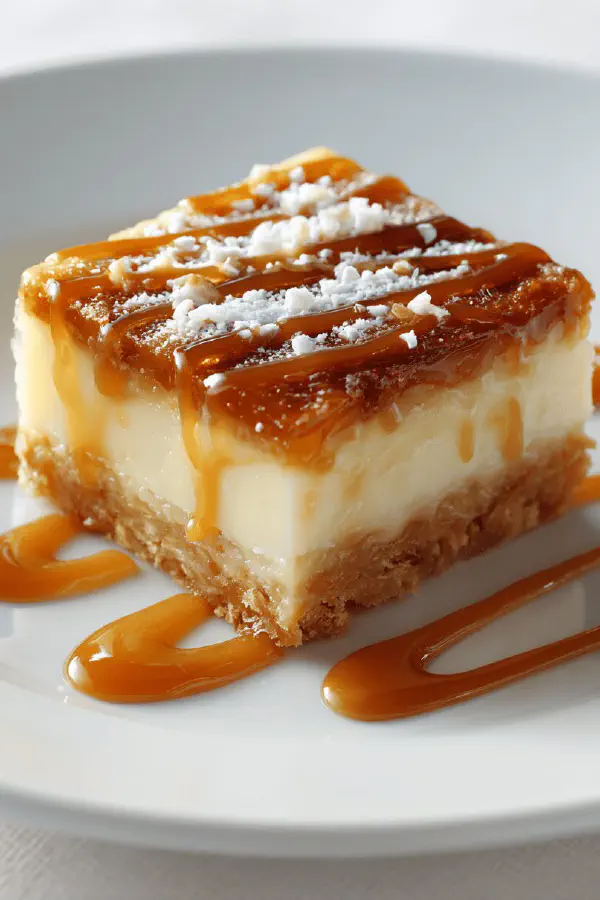
Maple Cream Squares
By Kate
"
Creamy maple sugar squares blending brown sugar and honey with a hint of coconut cream. Cooked to firm soft ball stage, beaten to lose shine but remain pliable. Incorporates white chocolate and vanilla extract. Easy to make with clear stages denoted by syrup temperature and texture changes. Ideal for batch prep and freezes well. Prepared using a parchment-lined pan for clean removal. Classic winter sweet treat reinvented with subtle tropical twist.
"
Prep:
15 min
Cook:
15 min
Total:
30 min
Serves:
60 pieces
dessert
fudge
maple
coconut
holiday
Introduction
Sugar and cream marrying heat to form a creamy fudgy confection. Maple syrup and honey replace traditional corn syrup—less slippery but notes more complex, slightly floral. Coconut cream adds richness and body—yes, this alters the profile, smooths out graininess especially without eggs. Watch syrup bubble as sugar turns amber, not too dark or it’s bitterness. Temperature is your best friend here, reliable over clock watching. Cool syrup slowly; stubborn sugar crystals wait to pounce if rushed. Finally, whipping is not just flair; it sets mouthfeel and texture, lose shine first but spreadability still key. White chocolate? Optional but a neat twist, melts giving pockets of creaminess. The parchment paper trick saves pan scrubbing later. Freeze extras, warming brings the softness back. Not delicate candy; a strong sugar craft showing safe, tested steps. Rustle of whisk, sweet aroma fills kitchen, this gift from the kiln stays on repeat.
Ingredients
About the ingredients
Coconut cream works best for a richer mouthfeel compared to standard cream, though either works fine if you prefer neutral flavor. Dark brown sugar enhances the fudge’s depth but light brown can substitute if that’s what’s on hand. Honey replaces corn syrup smoothly while adding a floral undertone—avoid raw unfiltered honey which can affect clarity and cause graininess. Maple syrup must be genuine for that woody aroma; pancake syrup lacks sugars necessary for proper crystallization. White chocolate is optional but adds nuanced sweetness and color contrast. If unavailable, can omit or substitute with no impact on texture. Butter for greasing chosen to prevent sticky edges and maintain clean removal after setting—vegetable oils often too slick, causing sliding during cutting. Parchment paper not optional—salted or heavy-duty best for sturdy handling when lifting cool fudge out.
Method
Technique Tips
Dissolving sugar thoroughly before boiling prevents grainy fudge. Be patient bringing syrup to temperature then resist stirring at boil—stirring disrupts crystallization and creates flaws. Use a candy thermometer accurate and away from pan sides. Firm soft ball stage at 112°C is critical; too low fudge won’t set, too high risks hard brittle texture. Adding chocolate and vanilla post heat avoids scorching delicate flavors. Cool syrup gradually without stirring; rushing this step invites premature crystallization and gritty fudge. When whipping, observe loss of glossiness and thickening as signals to stop—too long and fudge transforms to solid paste soon becoming chalky. Spreading promptly while still pliable ensures even cooling with no cracks or bubbles. Cover to prevent forming a crust but don’t wrap loosely which traps moisture and induces sticky surface. Cleaning knife between cuts key for neat edges—an often overlooked but game changing tip for presentation. If temperamental, consider adding a pinch of cream of tartar at boil to stabilize sugar crystals and prevent grainy texture.
Chef's Notes
- 💡 Use coconut cream for richer flavor. Regular cream works but you lose that tropical hint. Dark brown sugar gives depth, light brown is fine if that’s on hand. Avoid raw honey; it can affect clarity and texture. Watch syrup closely while bubbling, the scent gets rich—an indicator it's time to remove from heat.
- 💡 If you rush cooling, crystal formation happens. Avoid stirring as syrup thickens; that disrupts the process. Candy thermometer needs to be accurate and positioned right. Too low or high results in wrong textures. Blend in white chocolate after removing from heat to avoid burning delicate flavors.
- 💡 A thick waxy film suggests overbeating. Stop when the glossy sheen fades, the texture thickens but don’t overdo it. Quick spreading is key; don’t let the mixture set too much in the pan. Skin forms if you skip covering with plastic wrap directly on the surface.
- 💡 Wipe your knife with warm water between cuts; prevents sticking and gives smoother edges. For stubborn edges, consider a bit of butter on your knife. Always store in an airtight container but don't let it get too chilled—see how the texture goes? Too firm for easy cutting.
- 💡 Adding cream of tartar might stabilize sugar crystals. A pinch during boiling can help if you struggle with graininess. Watch the temperature closely at soft-ball stage; let it set slowly in the pan. A minute too long can make all the difference in texture.
Kitchen Wisdom
What if it doesn't set?
Check temperature; overcooking causes hard texture. Try less heat next time. Too much stirring in syrup invites a gritty result.
What should I do if the fudge becomes grainy?
Temperature issue at soft ball stage. Slow cooling is also crucial; rushing that step can introduce crystals.
How long does it keep?
Up to five days in container. Freezing? A month max. Let thaw slowly to recover softness; quick thawing makes it tough.
Can I use different sugars?
Yes, regular brown works but flavor changes slightly. Coconut cream can swap for regular cream but alters taste profile.