Featured Recipe
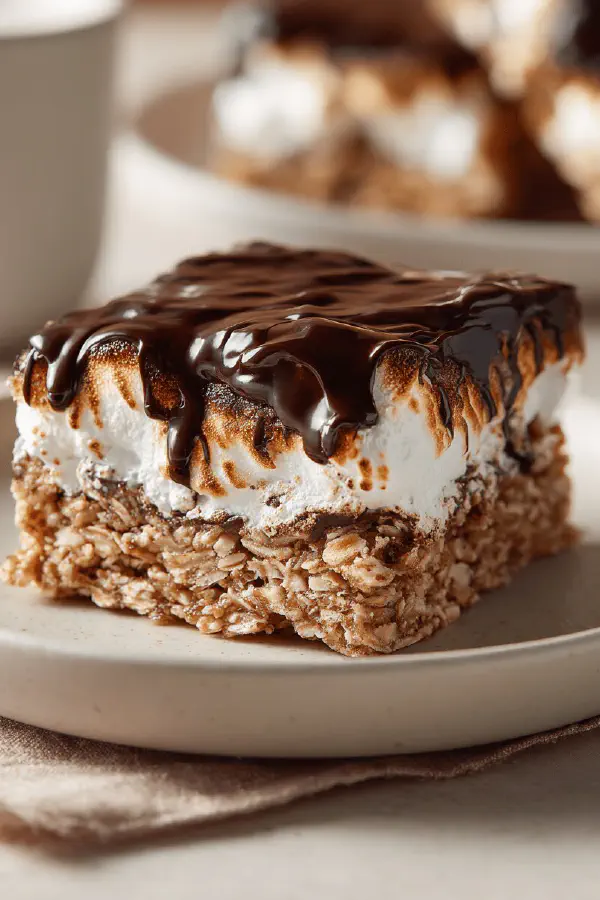
Maple Marshmallow Chocolate Bars
By Kate
"
Bars with a tender crust made from oat and whole wheat flour, topped with a cloud-like marshmallow layer spiked with maple flavor and sprinkled with a pinch of salt, finished with a bittersweet dark chocolate glaze. No eggs or nuts. Gelatin bloom and sugar temperature critical for texture. Offers tweaks for syrup substitutions and flour swaps in case of allergies or pantry gaps. Baking cues focus on golden-brown crust edges and marshmallow peaks that hold shape but remain pillowy.
"
Prep:
40 min
Cook:
20 min
Total:
Serves:
12 bars
dessert
chocolate
maple
no gluten
Introduction
Soggy crusts. We’ve all fought them. Here, strong oats and whole wheat add bite and nutty depth, a sturdy base that holds marshmallow weight. Marshmallow itself? A whipped syrup, not just sugar fluff—gelatin’s bloom, syrup temp crucial. Skip that, you’re stuck with glue or puddles. Maple adds a sharp sweet note, balanced with agave’s mild body and salt to cut syrup’s cloying. Chocolate finish seals moisture but remains glossy when tempered right. No need to fear shrinking dough; cold butter and resting calm gluten. Whip till peaks hold; soft peaks mean repeat. Let bars rest before slicing; patience for texture is king. The kitchen smells like toasted oats, sweet syrup, dark chocolate midmix; cues not to be missed.
Ingredients
Crust
- 120 g (3/4 cup) whole wheat flour
- 90 g (3/4 cup) rolled oats, ground finely
- 30 g (3 tbsp) maple sugar
- 60 g (4 tbsp) unsalted cold butter, diced
- 1 tbsp cold water
- 8 ml (1 1/2 tsp) gelatin powder
- 25 ml (5 tsp) cold water
- 140 ml (just under 2/3 cup) maple syrup
- 20 ml (1 1/2 tbsp) light agave syrup
- 1/4 tsp fine sea salt
- 100 g bittersweet chocolate, melted and tempered
Marshmallow
Topping
About the ingredients
Whole wheat flour strengthens crust structure, prevents crumbling that all all-purpose flours alone can cause; oats add chew, a rustic bite missing in white flour. Maple sugar brings focused earthiness beyond plain sugar, though coconut sugar is fine sub with milder maple notes. Butter temperature—keep it cold to cut in properly; warm butter will yield greasy dough and flat, dense crust. Water quantity critical: too much—sticky dough, tough bake; too little—dry, crumbly. Bloom gelatin thoroughly; cold water bath important; gelatin that’s not fully hydrated won’t set marshmallow properly. Maple syrup dark variety recommended but avoid bitter-cooked versions; flavor impacts final result. Agave smooths texture, but corn syrup closest substituent, helps prevent sugar crystallization during boiling. Temper chocolate carefully, room temp or slightly warm chocolate will dull or bloom; proper tempering ensures snap and shine. Apply chocolate at room temp to marshmallow; cold marshmallow can crack chocolate as it hardens. Fresh bars not bars kept weeks—marshmallow softens with time and humidity.
Method
Crust
- 1. Pulse whole wheat flour, oat flour, and maple sugar in food processor until well combined. Add butter cubes; pulse 3-4 times until the mixture resembles coarse crumbs the size of peas. If overmixing, dough becomes greasy; stop early.
- 2. Add cold water slowly, pulse once or twice to bring dough together just enough to form rough clumps; avoid kneading by hand to keep flaky texture.
- 3. Dump onto lightly floured surface; press into a rough rectangle roughly 40 x 15 cm. Chill dough disc wrapped for 20 minutes to rest gluten, prevent shrinkage.
- 4. Roll dough out to fit a 35 x 10 cm rectangular removable-bottom pan. Trim edges. Dock with fork evenly to stop bubbling during baking.
- 5. Lower oven rack to bottom third. Preheat to 205 °C (400 °F). Bake crust 15–20 minutes till edges gold and center sets but not dark. Surface will smell nutty, faint caramel scent. Cool on rack; crust feels firm but not hard.
- 6. Sprinkle gelatin over cold water in small bowl; let bloom 6 minutes until spongy surface.
- 7. In saucepan, warm maple syrup over medium heat until faint wisps of steam rise; caramel color intensifies slightly but don’t let it burn—hard to recover once dark.
- 8. Quickly add agave syrup and salt; bring to gentle boil, simmer 1-2 minutes until syrup starts to thicken slightly (test by dropping syrup on cold plate; it should be viscous but flow).
- 9. Remove from heat, whisk in gelatin mix until completely dissolved. Warm mixture ready for whipping should feel hot but not scorching. Let cool 10 minutes until lukewarm—not too hot or gel won’t whip well.
- 10. Use stand mixer with whisk attachment. Beat maple syrup mixture on medium-high speed until it triples volume and forms firm peaks—about 10-12 minutes. Texture: glossy, dense cloud; not grainy.
- 11. Pour marshmallow layer evenly over crust; spread gently with offset spatula. Marshmallow should hold shape when spatula passes through — firm but springy.
- 12. Let cool to room temperature for at least 30 minutes, uncovered, to set and lose tackiness. Avoid refrigeration or condensation that wets marshmallow surface.
- 13. Pour tempered bittersweet chocolate over set marshmallow, tilting pan to coat surface evenly. Use back of spoon or small spatula to smooth gently without breaking marshmallow beneath.
- 14. Let bars sit at cool room temperature 2–3 hours until chocolate firms completely. If your kitchen is warm, cool briefly in fridge but watch for moisture forming under chocolate.
- 15. Remove bars from pan; use sharp serrated knife warmed under hot water and dried before each cut to achieve clean slices.
- Serve fresh same day for best texture; marshmallow softens overnight and chocolate dulls.
- Substitutions: Substitute oat flour for rice flour if gluten-sensitive. Maple sugar can be swapped for coconut sugar—flavor lighter but caramel notes remain. Use corn syrup if agave unavailable but avoid honey to prevent crystallization. Gelatin can be replaced with agar, but whipping behavior differs; expect firmer, less elastic texture.
- Troubleshooting: If crust shrinks, dough likely overworked or too warm; chill longer next time. If marshmallow doesn’t set, check gelatin bloom or syrup temperature—too hot kills bloom, too cool prevents whipping. Chocolate bloom means tempering failed; slowly retemp or use good quality couverture.
Marshmallow
Chocolate topping
Technique Tips
Pulse flour and butter first to maintain crumbly consistency essential for flaky crust. Docking the crust stops untamed bubbles causing uneven rise; keep piercings shallow. Lowered rack critical to brown bottom and edges first, an often overlooked hint to prevent sogginess under heavy filling. Cooler dough means less shrinkage; rest times here trimmed slightly to speed prep without sacrificing results. Heat syrup slowly—darkening adds flavor but watch; caramel can turn bitter fast. Whisk gelatin dissolved in syrup swiftly; lumps mean uneven setting. Beat marshmallow till volume triples; if underwhipped, texture becomes gummy rather than fluffy. Cool marshmallow layer uncovered—traps humidity escape; sealed wet surfaces soften frostings unreadably. Warm chocolate for drizzle, not hot—too warm melts marshmallow beneath. Use hot knife to slice bars cleanly; watery moisture between layers ruins slice integrity. Timing is approximate; judge by smell, texture, sight—a tactile kitchen skill that prevents mistakes.
Chef's Notes
- 💡 Cold butter is key; prevents greasy dough. Dice and chill before mixing. Temperature really does matter; helps maintain flakiness.
- 💡 Measure flour correctly; spooned, not scooped. Too much means dense crust. Use kitchen scale for precision, it's worth it.
- 💡 Gelatin must bloom; don’t skip steps. Cold water first, then wait. If not blooming right, texture won't hold. Whip to light and fluffy.
- 💡 Chocolate temp impacts finish. If it looks dull, tempering failed. Slowly reheat to fix. Warm only, avoid melting marshmallow beneath.
- 💡 Cooling marshmallow is vital. Room temp, not fridge. If too wet, surface becomes soggy. Patience here will yield a nice texture.
Kitchen Wisdom
Why does my crust shrink?
Likely overmixed dough. Also check butter temp; keep it cold next time. Chill longer if needed.
Marshmallow doesn't hold shape?
Check gelatin step. If not fully bloomed, it won't whip correctly. Heat temp matters; too hot kills texture.
Can I store leftovers?
Airtight container, but short lifespan. Marshmallow softens quickly. Avoid fridge unless too warm outside.
What if syrup burns?
Quickly remove from heat; might salvage by adding water. Keep an eye on heat. Dark caramel can ruin flavors.