Featured Recipe
Melty S'mores Skillet
By Kate
"
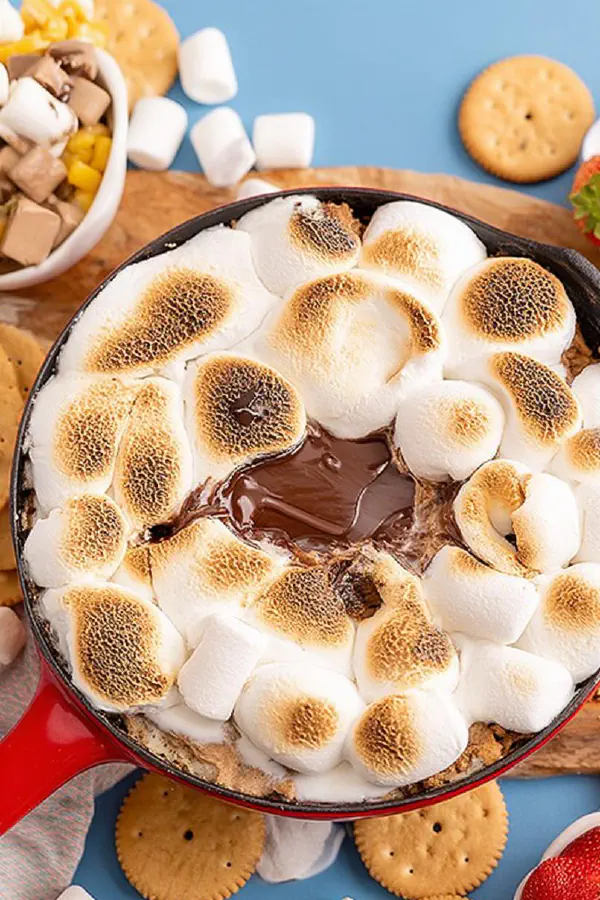
A quick, campfire-inspired dessert using bittersweet chocolate chunks and mini marshmallows baked until bubbling and golden on top. Swap regular graham crackers with cinnamon cookies for added warmth or use dried pineapple slices for a tropical twist. The method focuses on visual and tactile cues rather than strict timing, with a nod to skillet choice and chocolate type for best melt and flavor balance.
"
Prep:
7 min
Cook:
12 min
Total:
19 min
Serves:
6 servings
dessert
chocolate
easy recipes
s'mores
skillet
Introduction
Burnt marshmallows smell enters the kitchen but not too far—watching them closely. Chocolate deepening color as the marshmallow puffs up. No rush. Visual cues dictate. Not just a dip; understanding how heat tames sugar and cocoa butter. Cast iron matters; thermal hold prevents hotspots or burning. Marshmallows toasted just right; too much and you get that bitter edge instead of caramelized sugar sweet. A few tweaks from classic campfire S’mores: bittersweet bites for rounded bitterness and mini marshmallows to toast faster and more evenly. Twist with cinnamon cookies adding spice notes or dried pineapple for tang and chew. Practical tweaks because no one likes a scorched mess or cold, unmelted monster. Timing varies with ovens and ingredients; learn textures and smells. The adventure is in the watching and tasting.
Ingredients
About the ingredients
Use bittersweet chocolate chunks instead of milk chocolate chips; chunk shape melts more evenly and controls viscosity in the pan. Mini marshmallows toast faster and spread flavor nicely vs jumbo which can burn outside and leave cold goo inside. Cast iron skillet is best—retains heat, prevents quick burn. Substitute with oven-safe ceramic if unavailable but expect slightly different heat distribution, requiring closer watching. Dippers matter. Cinnamon cookies add spice contrast; graham crackers are traditional but can feel plain. Strawberries or dried pineapple introduce acidity cutting richness. If allergic to gluten or prefer paleo, use nut-thins or fruit slices. Avoid low-quality chocolate with stabilizers; melts tough and greasy. For less sweetness, try semi-sweet or 60% dark bars chopped. Avoid pure baking chocolate – lacks sugar so marshmallow dominates.
Method
Technique Tips
Preheat oven moderately lower than usual 350°F—340°F slows marshmallow scorching while allowing chocolate to soften uniformly. Chocolate chunk scatter is deliberate; prevents lumps or untouch melted patches. Marshmallow tight but not stacked too thick, ensures caramelization not soggy jelly center. Watch marshmallows visually: when tops grow puffy, edges start to brown amber to golden dark cream is the cue. Listen closely, crackles and faint pops means sugar caramelizing, stop before deep smoke or burnt smell. Resting 3 to 4 minutes after oven is crucial—chocolate will still be molten and marshmallow sets slightly. No immediate serving or extreme hot dip clump problem. Serve with assorted dippers to offer texture contrast. Leftovers reheat slowly in low 250°F oven or buttered double boiler; microwave risks grainy, split chocolate. Skip stirring once cooled—defeats layered textures worked hard for.
Chef's Notes
- 💡 Use bittersweet chocolate chunks; better melt, smoother texture. Don't go with milk chocolate; often too sweet. Avoid chunky patches.
- 💡 Marshmallows need attention. Watch for golden, toasted edges—too dark, too bitter. Sound hints; crackles mean sugar caramelizing. Stop before burning.
- 💡 Rest time is key; let it sit after baking 3 to 4 minutes. Chocolate stays molten; marshmallows firm slightly. Serve warm.
- 💡 Dippers are flexible. Cinnamon cookies add warmth; graham crackers are classic but maybe bland. Strawberries or dried fruit brings acidity.
- 💡 Reheat wisely; low oven or buttered double boiler keep chocolate smooth. Microwaving risks graininess. Leftovers need gentle handling.
Kitchen Wisdom
How to soften tough marshmallows?
Heat lightly, maybe use a torch—get just a bit puffy without burning. Options: use smaller ones, toast thoroughly.
S'mores Skillet not melting?
Check oven temp; should be 340F. Chocolate chunks must be scattered evenly. No bulky patches.
Storing leftovers properly?
Cool completely, refrigerate. Reheat gently; low heat keeps chocolate from clumping. Avoid microwave hacks.
Can I substitute chocolate types?
Sure, use semi-sweet or dark chocolate. Don’t go for pure baking chocolate; lacks sweetness, destroys balance.