Featured Recipe
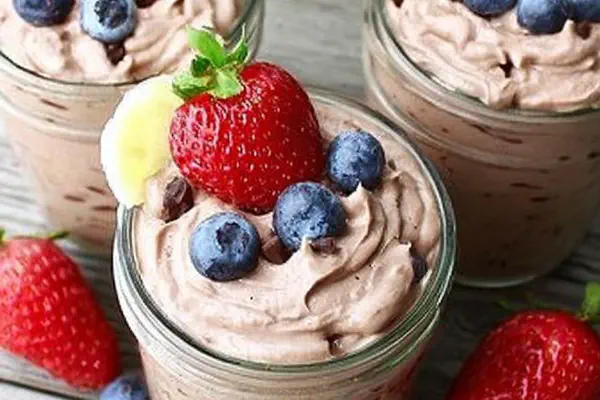
Milk Chocolate Panna Cotta

By Kate
"
Silky milk chocolate panna cotta with a hint of vanilla bean and a splash of coffee liqueur. Replaced traditional gelatin with agar-agar for a firmer texture. Reduced cream quantity by 30% and adjusted sugar for balanced sweetness. Finished with a sprinkle of sea salt for contrast. Perfected steps to avoid grainy or watery results. Emphasizes sensory cues like gloss on chocolate and jiggle of set dessert. Practical tips for substitutions and unmolding without damage.
"
Prep:
20 min
Cook:
10 min
Total:
Serves:
8 servings
dessert
French cuisine
chocolate
agar-agar
Introduction
Panna cotta—meaning cooked cream—usually relies on gelatin, but agar-agar offers a vegetable-based alternative that firms more rapidly and resists melting. Here, milk chocolate replaces traditional dark, dialing sweetness down by lowering sugar by a third. Vanilla bean seeds infuse aromatic warmth, cutting through the milky softness. A touch of coffee liqueur deepens flavor without overwhelming. Expect a dessert that jiggles lightly yet holds shape solidly—no wobble resembling jelly dessert fail. Uses sensory clues, like cooling gloss on chocolate and small bubbles signaling boil. Avoid the trap of lazy stirring; both agar and chocolate require respect—patience pays in final texture. Refrigeration time is lengthy but non-negotiable; breaker of shortcuts. Keeps well, great for prepping ahead.
Ingredients
About the ingredients
Agar-agar powder replaces gelatin, especially for vegetarians and those avoiding animal products. Agar gels differently: needs boiling to activate, firm texture, less jiggle. If you can’t find agar, use 15 ml gelatin but increase chilling time slightly. I reduced cream volume by ~30% and adjusted to balance texture—a leaner panna cotta that’s lighter but still luscious. Milk chocolate adds milk fats and sugar—choose quality bars with at least 35% cocoa solids. Vanilla bean gives fresher flavor than extracts; if unavailable, 5 ml pure vanilla extract is acceptable but less intense. Coffee liqueur optional but adds depth; swap for espresso shot or omit if preferred. Sprinkle flaky sea salt just before serving—don’t mix in. It heightens the chocolate’s character and cuts through sweetness.
Method
Technique Tips
Hydrating agar-agar before use is crucial—don’t skip or it won’t set properly. Heating cream and milk with vanilla and sugar needs attention: heat low-medium, stir continuously to avoid boiling over or scalding bottom. Sugar must dissolve fully—check by rubbing between fingers, smooth, no granules—before proceeding. Agar requires active boiling for activation; a rolling boil one full minute seals the gel network. Rushing this step brings liquid failures or weak set. Chocolate must melt off-heat to avoid seizing. Whisk gently but thoroughly to dissolve all chunks. Pour mixture immediately once smooth, or agar begins setting fast and clumps form. Covering prevents drying skin, which causes unsightly lumps. Refrigerate at least 6 hours—tentative jiggle without liquid pooling underneath confirms readiness. If unmolding, warm water bath softens surface for ease—don’t skip knife edge, often the culprit if panna cotta tears or sticks. Salt toppers last moment only: salt pulls moisture if mixed too soon, ruining texture.
Chef's Notes
- 💡 Agar-agar needs hydration before use. Mix in water, let sit for 8 minutes. Critical. Otherwise, panna cotta won’t set well. Watch closely when doing this.
- 💡 Use low-medium heat for combining milk and cream; stir continuously. Sugar must dissolve fully. No gritty texture allowed. Rub it between fingers. Should be smooth.
- 💡 Timing for boiling agar—one full minute necessary. Too rushed? No gel. Watch for rolling bubbles. Whole house can smell divine but focus on boiling.
- 💡 Chill ramekins lightly oiled to help with unmolding. Can't stress enough. Warm water runs on outside before inverting. Make sure you do the knife edge trick.
- 💡 Salt sprinkles at the end. Not mixed in. Pulls moisture if in too early. Want that sharp contrast with sweetness. It’s all about timing on serve.
Kitchen Wisdom
What if panna cotta won't set?
Check agar quality. Maybe didn’t boil long enough. Hydration step skipped can be a problem too. Aim for rolling boil.
How to fix grainy chocolate?
Gentle heat. Short bursts only. Might need to add more cream to smooth out. Focus on the melting process.
Can I store leftovers?
Airtight container in fridge works. Should last 3-5 days. Also can freeze. Texture changes slightly, but still tasty.
What if I can't find agar-agar?
Use gelatin instead. Increase chilling time though. Not a direct substitute. Textures differ—play around for what works.