Featured Recipe
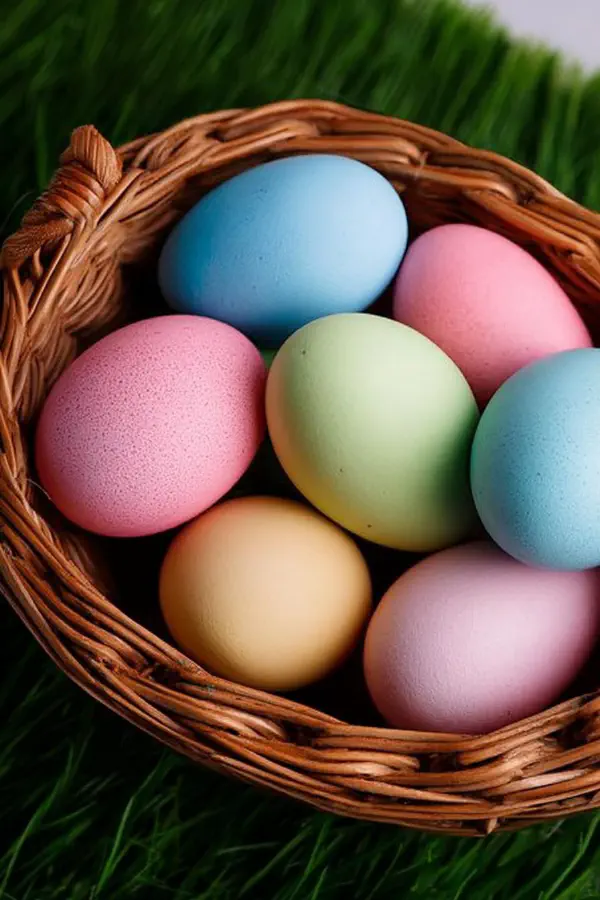
Vibrant Easter Egg Dyeing
By Kate
"
Dye eggs using thick gel colors, proving richer hues compared to liquid dyes. Each color prepped with vinegar and hot water, dissolving and dispersing pigments evenly. Eggs immersed and turned for balanced saturation. Drying techniques vary—use cooling racks or paper towels. Substitute apple cider vinegar for white vinegar if needed. Metal hooks can replace spoons for dipping—tools matter. Watch color depth not by a timer but by eye. Avoid clumps by whisking thoroughly. Handling damp eggs too soon wrecks finish. Focus on layering color and drying spaces to avoid smudges. Small tweaks in color amount shift vibrancy; experience guides judgment. The process depends on heat and acid to fix dye into shell pores.
"
Prep:
12 min
Cook:
0 min
Total:
12 min
Serves:
12 servings
Easter
crafts
family fun
Introduction
Colors that cling tightly to eggshells require more than just dunking in dye; you need chemistry, timing, and texture awareness. Thick gels punch richer, longer-lasting hues than water-thin liquids. Too little pigment leaves faded spots; too much clumps and rolls off. Vinegar acid seals pigment inside tiny pores in shells, which, combined with hot water, opens up the shell surface for absorption. Go for hot—warm water won’t fix dye properly, and can leave blotches. Whisk vigorously to avoid drying chunks that scratch, create uneven stains. Toss your plastic spoons; metal hooks better for rotating the eggs, controlling drip, preventing breaks. Drying spots reveal where pigment took hold. Crease careful in moving freshly dyed eggs to avoid smudges or shell fractures. Remember—deep color isn’t instant. Watch, judge, repeat. Add twists like beet juice or turmeric for unexpected tones. Kitchen chemistry and patience win over rushing steps every time.
Ingredients
About the ingredients
Gel food colors provide more saturated colors because they have less water and higher pigment concentration than liquid types. This cuts down streaks and uneven tone. Apple cider vinegar is a great substitute for white vinegar, introducing a subtler aroma that won’t clash with dye scents. Turmeric powder can add golden hues if dissolved well enough, but it stains hands easily; gloves recommended. Beet juice replaces one dye bowl for a natural rich red, though it tends to stain porous surfaces and tables. Hard boiled eggs need to be cooled completely before dyeing to prevent cracks. Metal from a hanger twisted into a dipper is a clever hack—better access and less dropping. Hot water is key; not just warm, but steaming hot for proper pigment transfer. Avoid cold or room-temp water which yields poor adhesion.
Method
Preparation
- Select gel food colors — thicker gels stain deeper than runny liquids. Use between 1/5 to 2/5 teaspoon per bowl; more pigment means stronger color. Avoid clumped, uneven patches by measuring precisely.
- Place colors into six separate bowls. Each gets a unique hue or intensity. Add 1 tablespoon apple cider vinegar into each bowl—acid tightens shell pores for color penetration. Stir briskly to dissolve pigments fully into the vinegar before adding water.
- Heat enough water to fill all six bowls with 1 cup each. Boil on stove or microwave safely for around 4-6 minutes; water must be steaming, not luke-warm. Use oven mitts to avoid burns when handling hot liquids.
- Pour hot water into the bowls over dissolved dye mix. Whisk again vigorously until color suspends evenly. Clumps ruin uniform staining—persistent whisking critical to avoid blotched eggs.
- Slip hard boiled eggs into dye baths. Use a spoon, tongs, or rig a small dipper from thin metal. Metal hooks let you dunk and swivel eggs with better control and less mess compared to spoons catching dripping dye.
- Rotate eggs constantly for even coverage. Spotted or streaked shells mean uneven rotation or clumpy dye suspension. Longer sits deepen shade, but over-immersing eggs can dry dull — watch color shift every minute, not the clock.
- Remove eggs carefully, letting excess liquid drip back into bowl. Handle gently to prevent shell cracks or unwanted textures from soaking up dye where not intended.
- Place dyed eggs on racks, paper towels, or Instant Pot trivets. Avoid stacking wet eggs; contact smudges delicate fresh color. Dry spots reveal promising texture; shells will feel velvety, not sticky. Total drying time varies with humidity—test carefully before handling further.
- Clean dye stains off counters with vinegar wipes if spilled. Staining fingers? Lemon juice rub followed by soap removes stubborn color quickly.
- Storage tips: Store dry eggs in egg cartons or cushioned boxes away from light to preserve color. Refrigerate if keeping beyond a day, but don’t seal damp eggs tightly—causes condensation and dulls shell shine.
- Ran out of gel dye? Powdered powdered spices like turmeric add natural yellows; beet juice offers vibrant reds—adjust vinegar amount down slightly with juice. If eggs don’t color fully, check acidity in water; too little vinegar means shallow penetration. Cold water stops color fix and creates blotches.
- If dye clubs or looks patchy, remix the batch before immersing next eggs. Stirring vigorously between each single egg helps.
- Paper towels or kitchen cloths get stained. Use old linens or dedicated napkins to avoid embarrassing bleach stains on nicer stuff.
- Metal dipper trick: twist a wire coat hanger into a tiny cage for eggs, making dunking safe and drip-free. Cheaper than buying special kit tools.
Dyeing eggs
Drying and finishing
Substitutions & troubleshooting
Technique Tips
Step order is deliberate: dissolve color in vinegar first—acid preps shell pores and stabilizes pigment. Adding hot water second brings temperature to levels needed for efficient absorption. Whisking twice—once before adding water, once after—is crucial to prevent clumps that cause patchy coloring. Dye immersion needs constant rotation. Resting eggs too long without turning leads to pooling pigment in spots. Remove eggs carefully to avoid cracks; shell surface is fragile when wet and pigmented. Drying on racks rather than towels minimizes smudges caused by transferring eggs too early. Look for tactile signals: shell should dry matte but smooth, not sticky or rough. Use leftovers dye respectfully—strain clumps out and re-whisk when reusing dye baths. Always wash surfaces immediately after spills with vinegar-based cleaner to prevent staining. Patience over speed: colors deepen if you watch and judge, not by timer alone.
Chef's Notes
- 💡 Choose gel over liquid colors. Gels provide richer hues. Measure pigment. Too little = faded, too much = clumpy. Mix well, avoid uneven patches.
- 💡 Vinegar opens pores in eggshells. Essential for dye. Hot water must be steaming for best penetration. Avoid lukewarm; it won't fix the dye right.
- 💡 Whisk dye thoroughly before adding water. Prevent reluctant clumps. Stir after mixing. Keep texture smooth for color evenness. No sticking patches.
- 💡 Rotate eggs consistently in the dye. Streaked shells mean uneven distribution. Watch color shifts, don’t rely solely on a timer.
- 💡 Dry eggs on racks instead of towels. Minimizes smudging and contact marks. Look for a matte finish without stickiness—smooth surface = done.
Kitchen Wisdom
How can I fix fading colors?
Add more vinegar to the dye. Check water temp; hot water helps absorption. Mix dye each time before use.
What if dye stains my fingers?
Use lemon juice scrub. Soap afterward removes most stains. Prevent mess: gloves are handy with turmeric.
What's a good alternative to gel dye?
Use spices like turmeric for yellow. Beet juice can substitute too for red tones—adjust vinegar level.
How to store dyed eggs properly?
Keep in cartons or cushioned boxes. Don’t seal damp eggs tightly; condensation dulls colors over time.